Sunday, July 31, 2011
All new posts will be on my new blog
I have created a new blog at creativeagents.blogspot.com
visit there for any new ideas, inspiration and secret missions. :)
Sunday, June 12, 2011
June's Studio J "Love Your Layout"
Wednesday, June 1, 2011
"Ganga" Deal of the Week!
I have discovered that if I save my Sunday paper's coupon insert I can match up the big sales at the store with the older coupons and get FREE stuff! (Or extremely cheap stuff.)
This week (5/29-6/4/11) you can get the OFF Clip On starter kits for only $3 each at Walgreen's. (Regularly $9.99 each)
These are the newish product from OFF that you clip onto your clothing and it emits the OFF "smell" to repel mosquitoes and you don't have to spray that gunk on your skin!
I get GIGANTIC welts from those pesky critters and HATE mosquitoes!!!!!! So this is an exciting deal. Here's how:
Go to B1G1Free .com (just click on that link) I am not sure how long it will be active so do it NOW!
Print 2 of the Buy 1 Get 1 Free OFF clip on coupons. (say that 3times fast)
Take the coupons to Walgreen's where the OFF starter kit is on sale for $7.99/ea. Get 4 starter kits.
Get the Walgreen's June in store coupon booklet where there is a $1 off coupon for any OFF product (also good for Raid) Your total for you order after your coupons will be $12 with tax!
That is only $3 EACH for the kit. Woo hOO!!! you just scored your first GANGA deal. Keep posted each Sunday or Monday for my GANGA deal of the week. :) Feel free to share your super coupon deals in the comments.
Friday, May 27, 2011
Love your layout with Studio J
Leave a comment and let me know what you think of the techniques!
Thursday, May 5, 2011
Studio J Boot Camp Rock(s)!
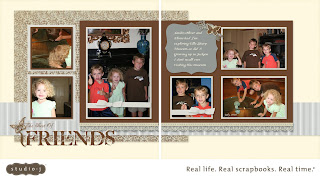
Above we layered the title. These pages show Oliver, Eloise and Xander exploring the Ella Sharp Museum in Jackson..."What? They had to get water out of the ground?!"
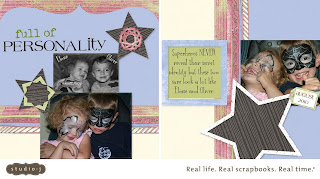
Above Eloise and Oliver had their faces painted at the mall on family day and were sooooo proud of the disguise.
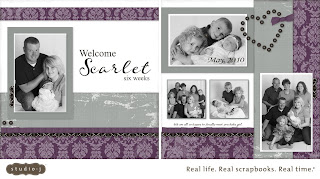 Above are photos taken a year ago when Scarlet was born...last Mother's Day in fact! That is my brother, sister in law and baby Scarlet. My parents and the kids and I are in the smaller photos.
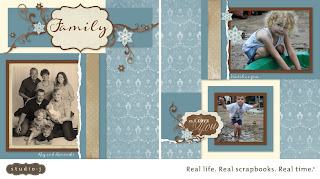 Above are the title page and the back page for the book...so the photos don't necessarily match. What fun rain in desert can be.
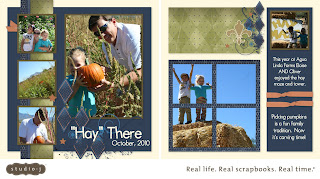 Above we are back at Agua Linda...how cool is that picture with the hay stack mountain! Easy technique; just drop your photo into the wells same picture 4 photo wells, then increase the size of each one to at least 200% adjust the position and sit back to appreciate your mad artistic skills! :)
Tuesday, May 3, 2011
Studio J Bootcamp
We will be learning the ins and outs of using this software and I will have sooooo many cool tips to teach when I return.
Stay tuned for pictures of the layouts, video tutorials and more studio scrapbooking fun.
Wednesday, April 13, 2011
Layered Flower Technique Blog Hop

If you are interested in the details keep reading otherwise you can hop on over to Heather Martin's blog Heather's blog and find another way to utilize this technique. Be sure to leave a comment here before you go and let me know what you think of my adaptation of this technique and happy hopping.
To create this look I masked the base image and stamped onto the 2 3/4" x 2 3/4" white daisy cardstock. Next I used a seperate piece of cardstock and stamped the image again in crystal blue and again in sweet leaf. I trimmed the image leaving only the body and feathers for the successive layers.
I then used a craft knife to carefully cut around the oval shaped feathers on the peacock's body on the top two layers. Once I finished trimming I curled the edges and inked the edges to create a crisp edge.
Once I was satisfied with the layers I used Tombow adhesive to tape the images onto each other. Last I added tiny sparkles in blues and greens for the eyes and "eyes" of the feathers.
To make a card like this you need:
D1438 Circle of Love Stamp Set
D1472 Simple Memories Stamp Set
X7133b Miracle Level 2 Paper pack
Z2153 Sweet Leaf and Z2117 Crystal Blue Ink Pads
Z1327 Sparkles - Blue and Green Assortment
Here are some pictures of the basic technique:
 Thanks for stopping by. Please continue on to Heather's Blog and see how Heather has used this fun technique.


